
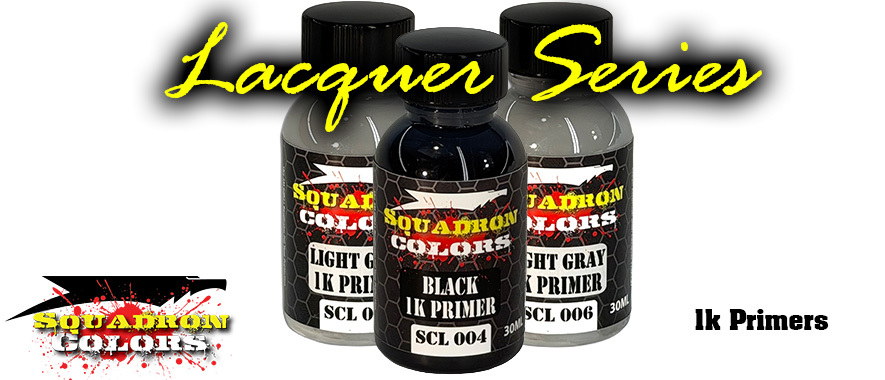
SQUADRON COLORS 1K LACQUER PRIMERS
The Foundation of a Great Paint Finish
A great paint job starts long before the final color goes on.
Squadron Colors 1K Lacquer Primers are designed to provide a smooth, durable foundation for your paint finish while helping reveal seams, scratches, sanding marks, and other imperfections that may need attention before painting.
This guide will walk you through preparing the model, choosing a primer color, mixing and spraying the primer, correcting the surface, and preparing it for paint.
1. BEFORE YOU PRIME
Primer will not hide poor surface preparation. In many cases, it will actually make imperfections easier to see—which is one of the reasons we use it.
Before priming:
-
Complete major assembly and seam work.
-
Fill gaps where necessary.
-
Sand seams, filler, and mold lines smooth.
-
Remove sanding dust.
-
Make sure the model is clean and completely dry.
-
Avoid handling prepared surfaces excessively with bare fingers.
Plastic, resin, 3D-printed parts, photo-etched metal, and other materials may require different preparation methods. Always make sure the material being painted is compatible with lacquer products.
WHY CLEANLINESS MATTERS
Fingerprints, mold-release agents, sanding residue, oils, dust, and other contaminants can interfere with paint adhesion and surface quality.
Your final finish can only be as good as the surface underneath it.
2. CHOOSING A PRIMER COLOR
There isn't one primer color that is correct for every project.
Squadron Colors offers different primer and base colors because the underlying surface can influence both the painting process and the appearance of subsequent colors.
Black, dark grey, light grey, white, pink, and other base colors can each be useful depending on what you're painting and the effect you're trying to achieve.
For general-purpose work, grey is an excellent starting point because it makes surface imperfections easy to see while providing a neutral foundation.
Black can be useful beneath darker colors, metallic finishes, and when you intentionally want a darker foundation.
White provides a bright foundation and can be especially useful beneath light or vibrant colors.
Pink can be particularly useful beneath certain reds, yellows, oranges, flesh tones, and other colors where a warm underlying tone is desirable.
These aren't rules. They're tools.
Experimenting with primer and base colors is one of the easiest ways to learn how the layers underneath your paint influence the finished model.
3. MIX THE PRIMER THOROUGHLY
IMPORTANT — DON'T SKIP THIS STEP
Primer contains pigments and solids that can settle during storage.
Shake the bottle until the mixing ball inside is freely moving, then continue shaking thoroughly to ensure settled material has been completely mixed back into the primer.
Simply hearing the mixing ball does not necessarily mean the primer is completely mixed.
Take the extra time to mix it thoroughly.
4. SETTING UP YOUR AIRBRUSH
Start at approximately 20 PSI and increase or decrease air pressure as needed to achieve the desired spray pattern and finish.
There is no single perfect PSI setting for every modeler.
Needle/nozzle size, airbrush design, spraying distance, temperature, elevation, compressor setup, and individual spraying technique can all affect the ideal pressure.
Think of 20 PSI as a starting point—not a rule.
Before spraying your model, test the primer on a paint mule, plastic spoon, scrap material, or another test surface. Adjust your pressure and paint flow until the primer atomizes smoothly and consistently.
USE A MOISTURE TRAP
A moisture/water trap is required when using an air compressor.
Compressing air creates condensation. Moisture can collect inside compressor tanks and air lines and eventually make its way toward your airbrush.
Water contamination can interfere with lacquer paint and negatively affect both the spray pattern and finish.
Make sure your moisture trap is installed, functioning properly, and drained as needed before spraying.
5. APPLYING THE PRIMER
Apply the primer in smooth, even passes.
Keep the airbrush moving and overlap each pass slightly to maintain consistent coverage.
The goal is to create an even primer layer—not flood the surface.
Allow each coat to flash before applying the next.
WHAT DOES “FLASH” MEAN?
Flash time is the short waiting period between coats that allows solvents in the freshly applied paint to begin evaporating.
As Squadron Colors 1K Primer flashes, the freshly sprayed wet appearance will disappear and the surface will become matte.
Once that happens, you can proceed with the next coat.
For ordinary priming, apply enough primer to achieve smooth, consistent coverage.
When using the primer as a surfacer before sanding, 2–3 coats can be used to provide additional material for surface correction.
Avoid excessively heavy application. Multiple controlled coats will generally produce better results than trying to achieve everything in one heavy coat.
6. INSPECT YOUR WORK
Once the primer has dried, inspect the model carefully.
This is one of the most valuable stages of the entire painting process.
Primer can reveal:
-
Visible seams
-
Sanding scratches
-
Sink marks
-
Gaps
-
Uneven filler
-
Surface damage
-
Glue marks
-
Imperfections that were difficult to see on bare plastic
Don't think of discovering an imperfection at this stage as a failure.
That's one of the jobs of primer.
Correct the problem, sand the area, and re-prime as necessary.
7. SANDING THE PRIMER
For an exceptionally smooth finish, Squadron Colors 1K Primer can be wet-sanded after it has dried sufficiently.
For final surface preparation, approximately 1500–2500 grit is a useful range.
Use light pressure and allow the abrasive to do the work.
The objective isn't to remove all the primer. You're smoothing minor texture and creating an exceptionally clean foundation for the paint layers that follow.
Be careful around raised details, sharp edges, rivets, and panel lines where it is easier to sand through the primer.
If you expose the underlying material, simply clean the area and apply additional primer where necessary.
8. READY FOR PAINT
Once you're satisfied with the surface:
-
Remove all sanding residue and dust.
-
Make sure the surface is clean.
-
Allow any moisture to evaporate completely.
-
Avoid contaminating the surface with fingerprints.
-
Proceed with your color coats.
At this point, your model should have a smooth, uniform foundation ready for paint.
TIPS & TRICKS & F.A.Q.
TEST FIRST
Every airbrush and working environment is slightly different. A quick test spray can save a lot of frustration.
DON'T CHASE COVERAGE WITH ONE HEAVY COAT
Controlled coats give you greater control and reduce the chance of runs, pooling, and unnecessary paint buildup.
USE PRIMER AS AN INSPECTION TOOL
Primer isn't only about adhesion. Use it to evaluate your surface preparation before expensive or complicated color work begins.
WATCH YOUR EDGES
Raised details and sharp edges are usually the first places you'll sand through primer.
KEEP IT CLEAN
The smoother and cleaner your primer surface is, the better your subsequent paint layers can look.
CAN I APPLY SQUADRON COLORS ACRYLIC PAINT OVER THIS PRIMER?
Yes. Squadron Colors Acrylic Paint may be applied over Squadron Colors 1K Lacquer Primer after the primer has dried thoroughly.
Make sure the primed surface is clean, dry, and free of dust, fingerprints, oils, and other contamination before applying the acrylic color.
CLEANUP
Clean your airbrush immediately after use with a quality lacquer thinner or lacquer airbrush cleaner.
Empty any remaining primer from the airbrush and flush thoroughly with lacquer thinner until it sprays clean.
For a more thorough cleaning, follow your airbrush manufacturer's instructions for disassembly and remove remaining primer from the needle, nozzle, and other paint-contact areas.
Do not allow lacquer primer to dry inside your airbrush.
Never return used primer or cleaning thinner to the original bottle.
SAFETY
For adult hobby use. Keep away from children.
Contains flammable solvents and produces harmful vapors. Always use appropriate respiratory protection and adequate ventilation when spraying.
Keep away from heat, sparks, and open flame.