
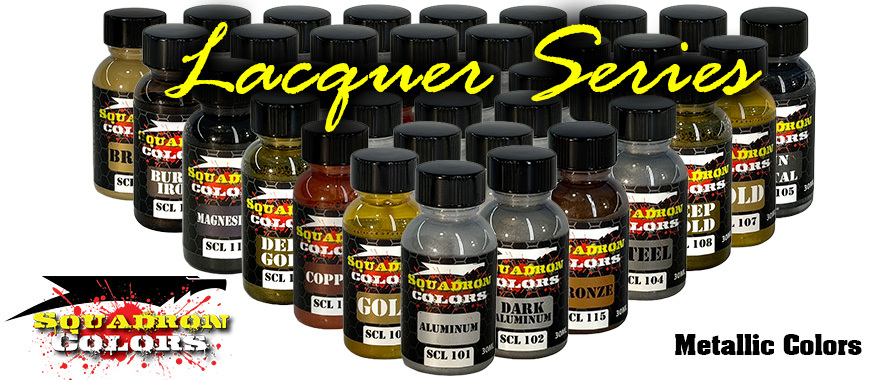
SQUADRON COLORS LACQUER METALLIC COLORS
Creating Realistic Metallic Finishes
Metal finishes are some of the most visually interesting finishes in scale modeling—and some of the most sensitive to what's underneath them.
Squadron Colors Lacquer Metallic Paints are designed to produce smooth metallic finishes with fine metallic character and excellent depth.
Whether you're painting a natural-metal aircraft, engine, exhaust, armor detail, automotive component, spacecraft, figure accessory, or another metallic surface, preparation and controlled application make the difference.
1. THE SURFACE UNDERNEATH MATTERS
Metallic paint tends to reveal surface imperfections more readily than many conventional colors.
Before painting, make sure the model is:
-
Properly assembled and filled
-
Smoothly sanded
-
Properly primed
-
Free of scratches you don't want visible
-
Clean and dry
-
Free of dust, oils, and fingerprints
The smoother the underlying surface, the smoother the metallic finish can appear.
2. CHOOSING YOUR PRIMER OR BASE COLOR
Metallic colors do not always have to be applied over black.
The primer or base color underneath a metallic paint can influence the final appearance.
Black, dark grey, light grey, white, and other colors can produce subtle differences in brightness, depth, and tone.
That makes your primer/base color another tool you can use when creating a metallic finish.
NATURAL-METAL AIRCRAFT TECHNIQUE
Real aircraft aren't normally made from one visually identical piece of metal. Different panels can reflect light differently because of material, grain, manufacturing, wear, replacement panels, and other factors.
One way to reproduce subtle variation is to change what's under the metallic paint.
For example, individual panels on a B-24 Liberator could be masked and given slightly different underlying shades using black and various shades gray.
Once those underlying panels are complete, an even application of Aluminum can be sprayed over the entire surface.
The variations underneath can subtly influence the Aluminum above them, creating panel differentiation without requiring every panel to be painted a completely different metallic color.
This is only one technique. Experiment with combinations to find the appearance that best represents the subject you're modeling.
3. MIX METALLIC PAINT THOROUGHLY
Metallic pigments can settle while the bottle is sitting.
Shake the bottle until the mixing ball is moving freely, then continue shaking thoroughly to make sure the metallic pigments are evenly distributed throughout the paint.
Proper mixing is especially important with metallic colors because inconsistent pigment distribution can affect the appearance of the finish.
4. AIRBRUSH SETUP
Start at approximately 20 PSI and adjust upward or downward as needed.
Needle/nozzle size, airbrush design, spraying distance, temperature, elevation, and other environmental conditions can change the ideal setting.
You're looking for fine, consistent atomization and a controlled spray pattern.
Always test before spraying the model.
DON'T FORGET YOUR MOISTURE TRAP
Water contamination and lacquer paint don't mix.
Always use a properly functioning moisture/water trap with your compressor and drain accumulated moisture as necessary.
5. APPLYING METALLIC COLORS
Apply Squadron Colors Metallics using thin, even coats.
Keep the airbrush moving and gradually build the finish.
Allow each coat to flash until matte before applying another.
WHAT DOES “FLASH UNTIL MATTE” MEAN?
Immediately after spraying, the surface may have a freshly applied wet appearance.
Wait.
As solvents evaporate, that wet appearance will disappear and the surface will become matte.
That's your visual indication that the coat has flashed and you're ready to proceed.
DON'T SPRAY METALLICS LIKE A HEAVY COLOR COAT
Avoid heavy or wet coats.
Flooding the surface can negatively affect the metallic appearance and reduce your control over the finish.
Instead:
Thin coat → Flash → Thin coat → Flash → Evaluate
Stop once you've achieved the coverage and appearance you want.
More paint isn't automatically better.
6. CREATING TONAL VARIATION
There are several ways to keep a large metallic model from looking like one solid block of silver.
You can vary:
-
Primer/base colors
-
Metallic colors
-
Number of coats
-
Panel treatment
-
Weathering
-
Final sheen
Subtlety is usually your friend.
Small differences that become visible as the model moves through the light often look more convincing than dramatic checkerboard-style panel differences.
7. MASKING OVER METALLICS
Allow metallic paint to dry thoroughly before masking.
Use appropriate modeling masking tape and avoid unnecessarily aggressive adhesives.
Burnish only as much as necessary to prevent paint from creeping underneath the tape.
When removing tape, pull it back slowly and carefully rather than rapidly pulling directly away from the surface.
For complicated natural-metal finishes, plan your painting sequence before you begin. Good planning can dramatically reduce the amount of masking required.
8. CLEAR COATING, DECALS & METALLIC FINISHES
A clear coat is not always required over a metallic finish. If you're happy with the appearance and the model does not require decals, weathering, or additional protection, you may choose to leave the metallic surface uncoated.
However, if your model requires decals, a clear coat becomes an important part of the finishing process.
For best results, decals should be applied over a smooth surface. A smooth gloss surface helps the decal film make complete contact with the model and reduces the chance of tiny air pockets becoming trapped underneath the carrier film. These trapped air pockets are one of the primary causes of decal silvering.
Depending on the metallic finish and its surface characteristics, applying a suitable gloss clear coat before decals can provide a smooth, consistent surface for decal application.
Once the decals have been applied, positioned, and allowed to dry completely, another clear coat can be applied over them. This helps protect the decals and reduces the visible transition between the decal carrier film and the surrounding painted surface.
Your final clear coat can then be selected according to the appearance you're trying to achieve — gloss, satin, matte, or another appropriate finish.
Keep in mind that any clear coat applied over metallic paint can alter its appearance, including its reflectivity, brightness, and metallic character. For this reason, we strongly recommend testing your complete painting and decal process on a test piece before applying it to an important model.
QUICK TIP
When decals are involved, think of the finish as a complete system:
Metallic Finish → Smooth Surface → Decals → Final Clear Coat
The goal is to give the decals the smoothest possible surface while preserving as much of the metallic character as possible.
TIPS & TRICKS
THINK IN LAYERS
The primer, base color, metallic color, weathering, and clear finish all contribute to what you ultimately see.
KEEP TEST PIECES
Plastic spoons, scrap models, spare wings, and paint mules are invaluable for experimenting with metallic combinations.
WRITE DOWN COMBINATIONS YOU LIKE
Found a great combination of Dark Grey + Aluminum? Record it. Building your own reference library makes future projects much easier.
LIGHT CHANGES EVERYTHING
Evaluate metallic finishes under several lighting conditions. Metallic paint can look very different under your workbench lamp than it does in daylight or under various model convention lights.
CLEANUP
Clean your airbrush immediately after use with a quality lacquer thinner or lacquer airbrush cleaner.
Empty remaining paint and flush thoroughly until the airbrush sprays clean.
Follow the airbrush manufacturer's instructions for more thorough disassembly and cleaning when necessary.
Never allow lacquer paint to dry inside your airbrush.
Never return used paint or cleaning thinner to the original bottle.
SAFETY
For adult hobby use. Keep away from children.
Contains flammable solvents and produces harmful vapors. Always use appropriate respiratory protection and adequate ventilation when spraying.
Keep away from heat, sparks, and open flame.